
Component Development Guide > Basics
Component Integration
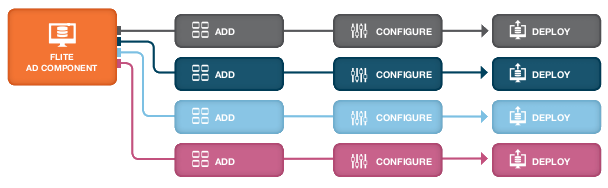
Once your component has been Flite-certified and made public, advertisers will be able to purchase it from Flite and start integrating it into their ads. Component integration refers to the process that an advertiser follows to do so. As the image above shows, once a component is released, there is no limit to the number of ads in which it can appear. Advertisers may use and reuse the component repeatedly in their Flite display ads.
You – the component developer – should go through this process as well. This will help you better understand how advertisers will use your component, allow you to test the component in the same environment where it will be used, and ultimately design the best possible component.
The steps below outline the workflow for integrating a component into an ad.
- Add the component: Make the component available in Ad Studio.
- Configure the component: Insert the component into an ad and configure it to your specifications.
- Deploy the component: Publish the ad with a component in it, and viewi component metrics.
Adding the component
When an advertiser obtains a component, Flite will share the component with them, making it visible in their Console. The first step is to expose the component in Ad Studio's Components Panel. This must be done by a user with admin privileges in the advertiser's organization, since only admin users have access to this functionality.
- Open up the Flite Console, and expand the Resources menu on the left side.
- Expand the Ad Studio 3 menu underneath Resources, and select Components. You will see a split view with all components that currently appear in Ad Studio's Components Panel (including built-in components) at the top, and a list of any components you have purchased or built at the bottom.
- In the list at the bottom, find your new component, and click the round checkbox on its left to add it to the list.
- Click the Apply Changes button to save the change.
- Click the Permissions button in the upper right to view the permissions structure for components. The Permissions screen will appear in the lower section of your split view.
- Make sure that all teams that should have access to the components in Ad Studio have at least the View permission.
- Click Apply Changes at the bottom of the Permissions screen to save your changes to the permissions structure.
You have successfully deployed your new component! Test this by opening up Ad Studio to edit an ad. The new component will now appear at the bottom of the Components Panel portion of the Content Editor, in a section called "Your Components". All users that you permissioned will see the same behavior, while all other users will only see the built-in components.
Configuring the component
The new component now appears in Ad Studio’s Components Panel, allowing your organization’s designers and developers to use it in building ads.
Adding a Flite Hub component to an ad works the same way as adding a built-in Flite component like Feed, Twitter, YouTube, Gallery, etc. Just click the component's name in the Components Panel, and the component is added to your ad as a new layer.
Please refer to Ad Studio documentation for more information on using Ad Studio.
The next step is to configure the component to work with your specific use case and match your desired look-and-feel and branding. You can do this by editing the component's settings. Just select the layer containing your component in the Layers Panel, and then edit its settings in the Inspector. Read the component’s documentation for details on what all the config parameters do, and any best practices for using this component.
Deploying the component
Once you have configured your component and the rest of your ad, you are ready to deploy it. This process is not component-specific, and is the same as launching any other Flite ad:
- Publish the ad by clicking the Publish button in Ad Studio's control bar.
- Create and configure placements in Ad Studio’s Flight Module.
- Generate ad tags and have them placed on the desired publisher site(s).
Please refer to Ad Studio documentation, the ad flighting tutorial, and the Ad Tags Tech Note for more information on flighting an ad.
Your component’s metrics will appear in Ad Studio’s Measure Module along with the other metrics for the ad. Check the component’s documentation for more information on what metrics are tracked and what they mean.